Overview :
Flutter is a multi-platform, open source, and free framework for creating mobile applications, introduced by Google. If you have got Android SDK installed and configured, to install Flutter then the job is done. You can use IntelliJ IDEA or Android Studio to create new applications using Flutter. Here we shall discuss generating build in android and ios using flutter.
Features of Flutter :
- Supports cross-platform implementations with same UI
- Modern and reactive framework.
- Simple and easy Dart programming language
- Fast development with beautiful and fluid user interfaces .
- Modern and reactive framework.
- Huge widget catalog with high performance .
Advantages of Flutter :
- A single code base that serves both the iOS and Android platforms
- More future extensions are available to support any platform
- Advanced level features are supported
Prerequisites :
- Android studio and SDK
- Install flutter SDK for your operating system. click here to install
Generate APK For Android in Flutter
- Go to your Flutter project path in Terminal.
- Enter the following cmd to clear the Build cache.
flutter clean- After flutter clean, enter the flutter pub get to install your dependencies
flutter pub get- Run your project before generating build by using this command
flutter run- When the project has completed running successfully, now it’s time to generate build (APK)
- Here is a single cmd that does the big work of generating APK in a flutter.
flutter build apk – – release- To generate debug Apk use this cmd.
flutter build apk – – debug- After running this command, the .apk file is generated in your project folder at the below path.
project folder -> build -> app -> outputs -> apk -> release (or) debug -> .apk file- In this step we upload .apk in diawi for sharing the apk and to get an Apk link. click here
Now the android apk can be downloaded from the diawi link following the above easy steps
Generate IPA For iOS in Flutter
Before generating Ipa confirm that the below configuration setup has been done.
- Register your app on App Store Connect.
- Register a Bundle ID.
- Create an App Store Connect application record.
- Review Xcode project settings
- Go to your Flutter project path in Terminal.
Enter the below cmd to clear the Build cache.
flutter clean- After flutter clean enter the flutter pub get to install your dependencies.
flutter pub get- Go to the project folder -> ios -> remove (Podfile.lock and Pods(folder).
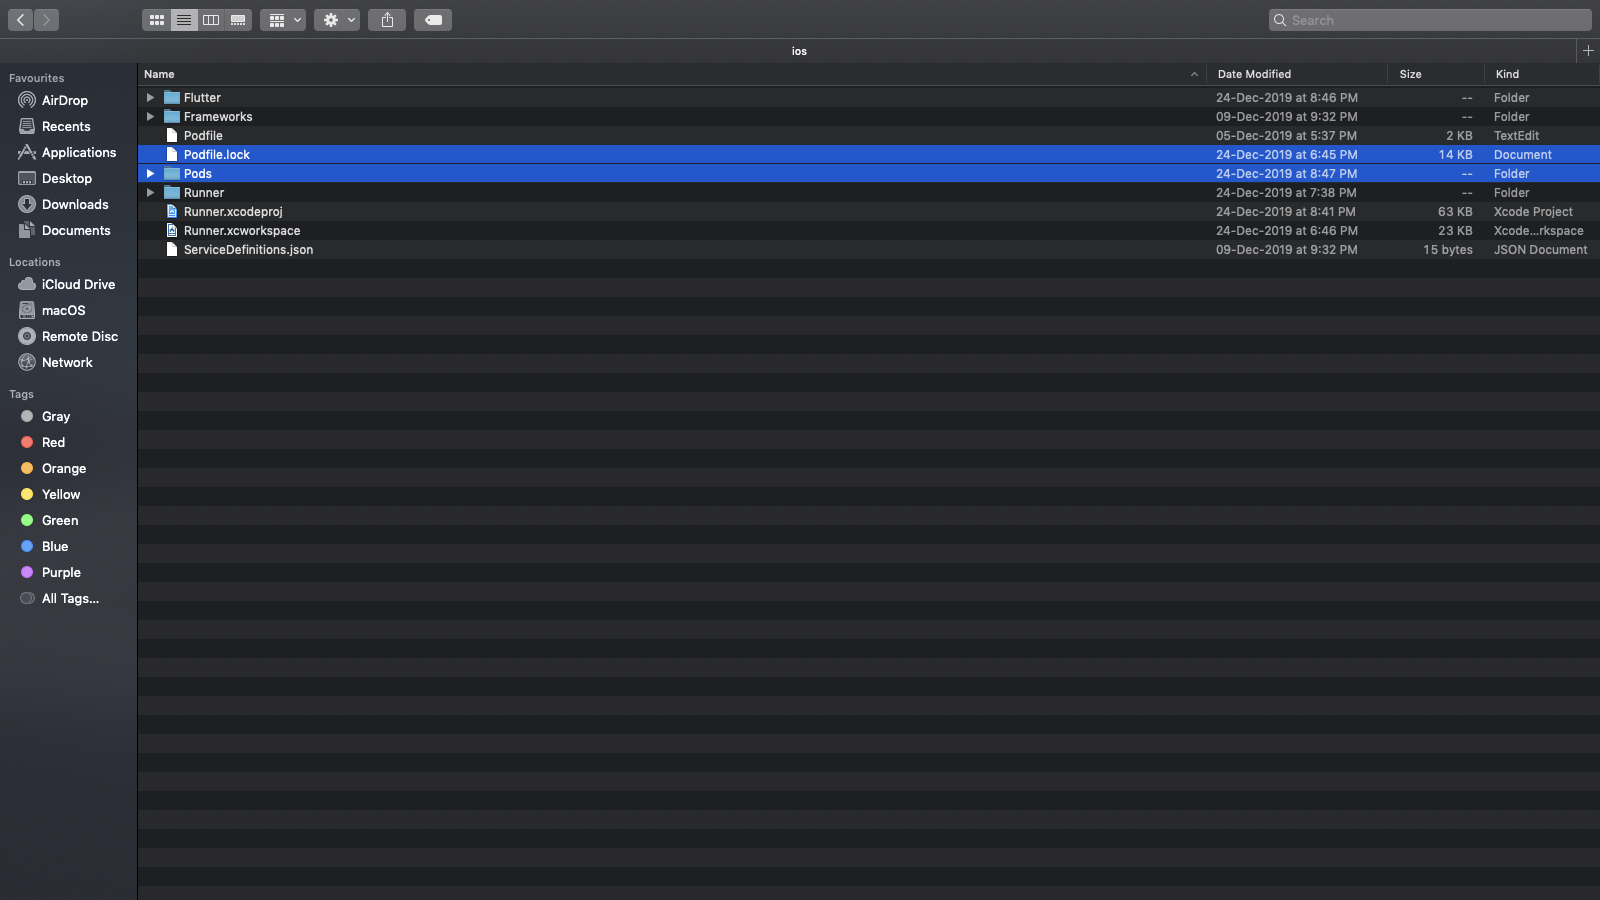
In Terminal use the below commands to install pod (pod install, pod update). After this, go to project folder -> ios -> open (.workspace) file. Check (Automatically signing, Selecting any iPhone device).
pod install
pod update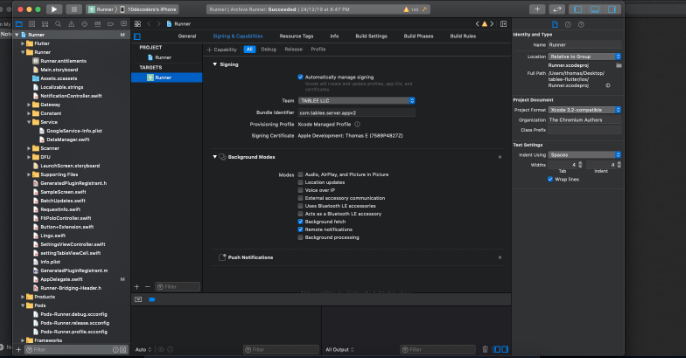
- Check File -> workspace settings -> build system (Legacy build)
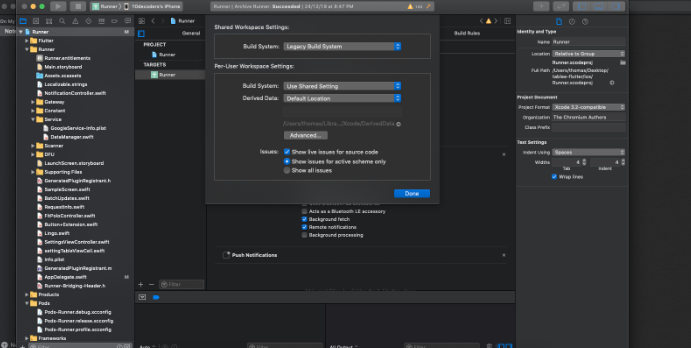
- Run the project (Product -> Run) after the build is completed successfully.
- Select the device as “Generic IOS Devices”.
- Select Product -> Archive.
- Select Distribute APP -> Development -> App Thinning (All compatible device variants)
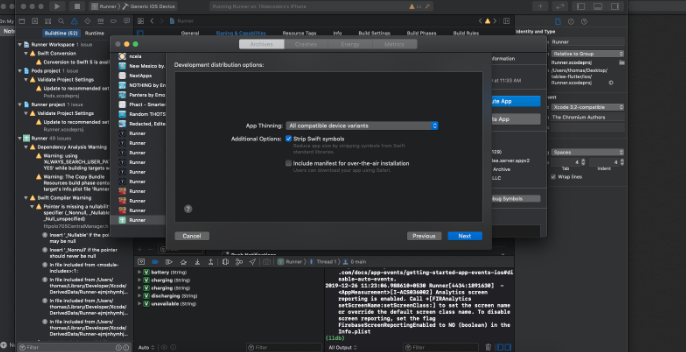
- Select Automatic signing from checkbox
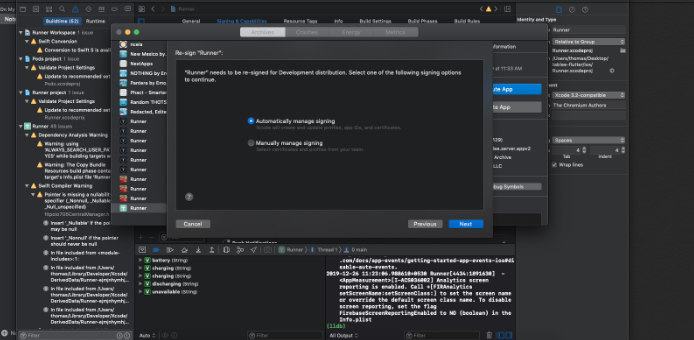
- Click the EXPORT button and save in your local path
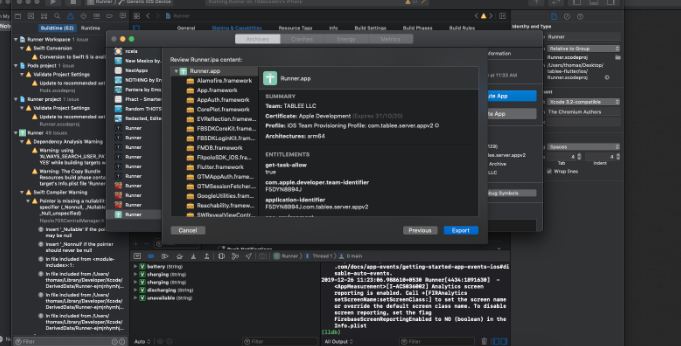
- Now upload the Runner.ipa in diawi to get an ipa link. click here
Here we had a brief description about generating android and ios build with simple steps and commands.

